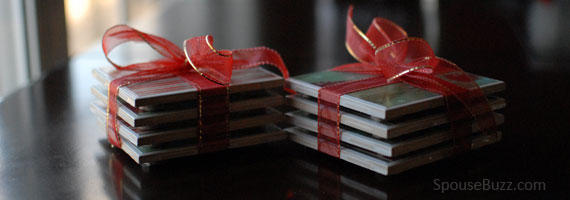
The more my schedule fills up with holiday parties, the more worried I get about the great hostess gift conundrum. How can I come up with something appropriate yet fun ... and also inexpensive? Making something takes time, but buying a gift can take longer as you go on the hunt for the perfect something.
When I came across these easy coasters I knew I'd hit gold. Easy? Yes! Cheap? Yes! Classy? Yes!
I chose to make them with Christmas paper, but you could put any pattern on them you like. I'm even considering making a batch for an upcoming meet and greet at our battalion commander's house with the battalion crest. These would also be fun to sell at your local spouse group's Ways and Means table with the symbol of units from our your base.
How to Make Decorative Coasters
1. Gather your supplies:

1. White bathroom tiles -- Home Depot sells these for $.16 a piece. THAT is a win.
2. Paper for the top of the coasters -- one for each tile. I cut mine to be 4x4 in. so that a small border showed on the tile.
3. Modge Podge -- buy at any craft store.
4. Foam or any other kind of brush.
5. Small felt pads for the bottom of the coasters
6. Acrylic spray
7. Decorative ribbon for wrapping the coasters when you're done.
2. Glue the papers to the tiles.

Paint the back of the paper with some Modge Podge. Flip the paper over and place it where you want it on the tile.
Paint Modge Podge over the entirety of the tile. Make sure your strokes go in only one direction since the Modge Podge is glossy and you'll be able to see your strokes when the tile dries.
3. Check for bubbles.

Hold the tile up and examine it for bubbles. If you see any use your finger to smooth them out.
4. Let the tiles dry and then add extra coats.

You'll want to paint two or three coats of Modge Podge on top of the tiles. Let them sit somewhere and dry for several hours or even overnight before continuing to the next step.
5. Spray with acrylic spray.

Spread your tiles out on newspaper in a very well ventilated area. It was a cold and windy day here when I did this, so I opened our garage and put them just inside the door.
Spray the tiles thoroughly with an even coat. If there is a breeze make sure it is not pushing the spray towards you or you'll end up with shiny pants. I wish I didn't know that from experience.
The spray smells very strong so if you do this in the garage make sure the garage door is open to ventilate and that you close the door to the house. ... yet another piece of advice I wish I didn't have based on experience.
Let the tiles dry for several hours or overnight before you proceed.
6. Add pads to the bottom.

These pads have sticky backs so this is just as simple as taking the paper off the back and the pad on the tile. Ta-da!
7. Package for delivery.

I twisted some ribbon around them and tied it in a bow.
All in all this was an easy, inexpensive project that produces a classy looking gift. Win!


